
ADD WHITE FRAME TO THE PHOTO
Hello dears,
the white frame around your photo looks very classy and doesn't take much time to create it.


Let's see how it works. I took one of my layouts which was created with collection ''Home renovation''.
Click on images to enlarge them.
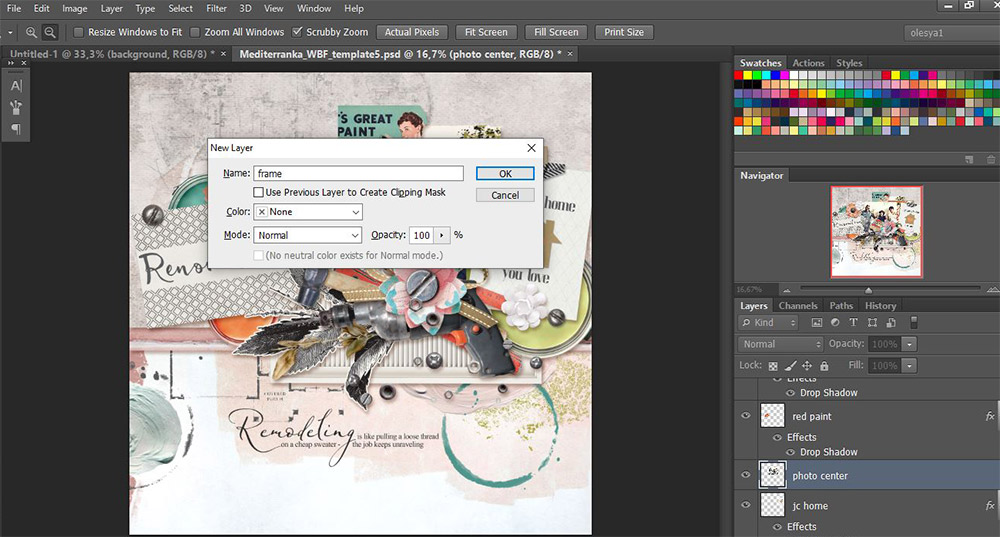
- Create a new layer named ''frame''.

- Be sure that the ''frame'' layer is active now. CTRL-click on layer with your photo (you create a selection, shown by the dotted lines).
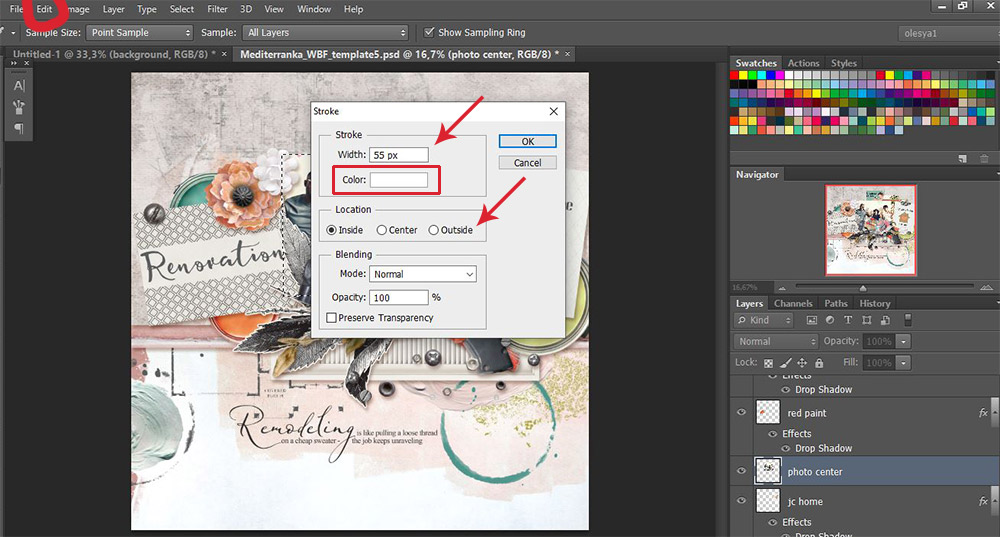
- Go to Edit - Stroke. Set the white color for your frame. Play with width. I usually use 35-55 px.
Not: By choosing CENTER or OUTSIDE location, you get the border with easy-rounded edges. I like to use INSIDE location.
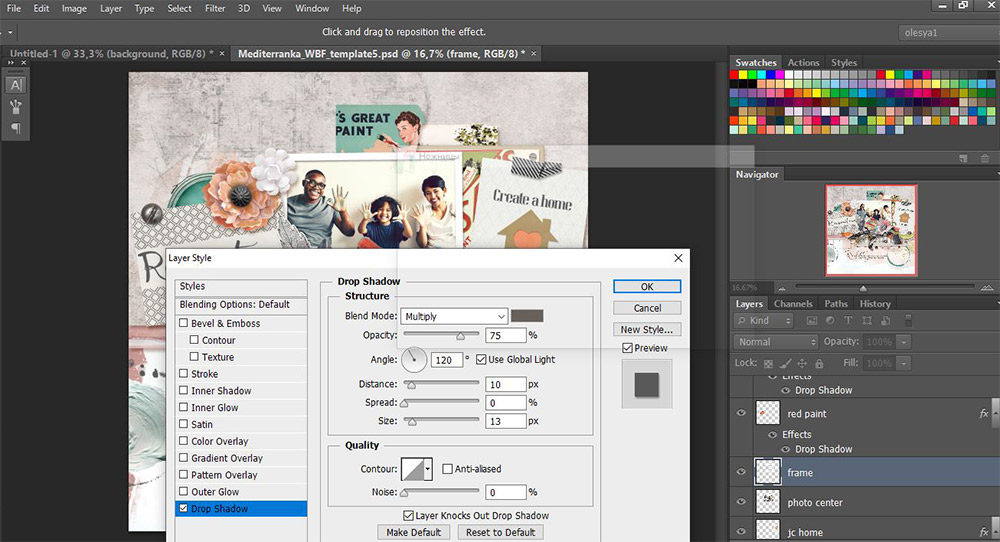
- Add shadow to your frame.
Or add shadow to your framed photo.
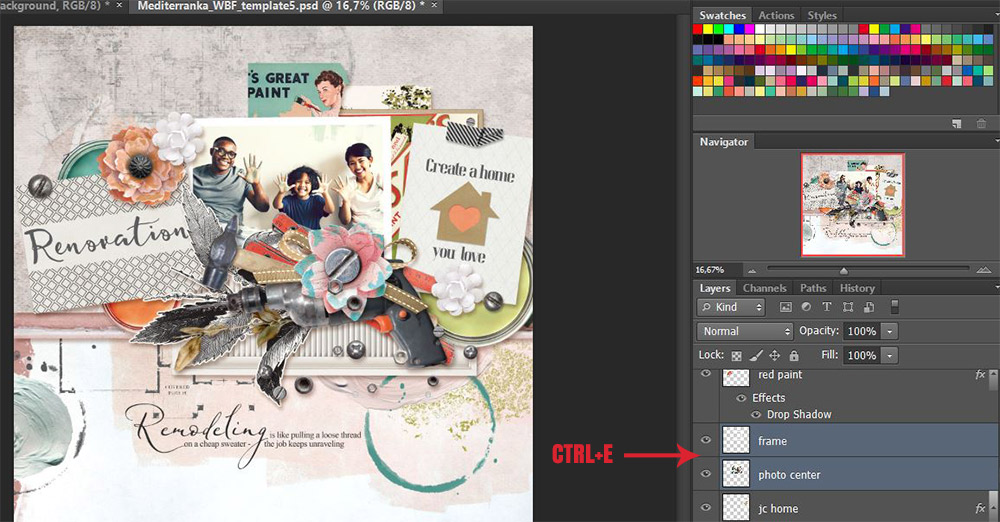
- SHIFT-clicking on both layers (photo and frame), then CTRL+E to merge the layers.

- Add shadow to the photo.
I hope this tutorial will help you to make your scrapbooking process easier.
X.O., your Olesya

Previous
BIG PICTURE AS A BACKGROUND

Newer