TN: HOW TO CREATE A FLIP FLAP
Full page photos are my favorite. I love how quickly layouts come together when I combine a full page photo with a simple patterned paper. White paper with some stamps and decorative elements works perfectly too. But I’m always looking for creative ways to add more photos or text and I incorporate them in a variety of ways. Using Flip Flaps is one of them! These techniques are as versatile as they are creative and add visual interest to your layouts. In this tutorial I will show you how to create a simply hybrid back to school layout for your traveler’s notebook using one big photo, a DIY flip flap and some digital supplies.
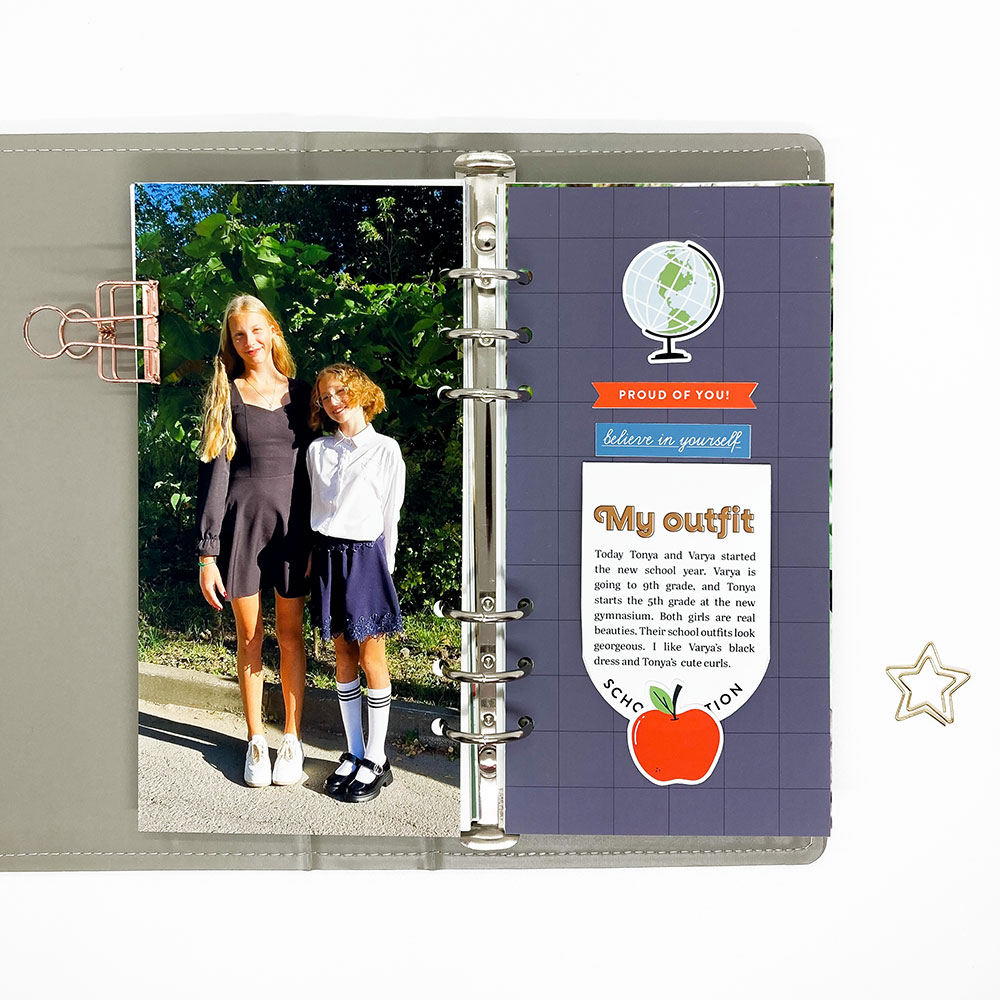
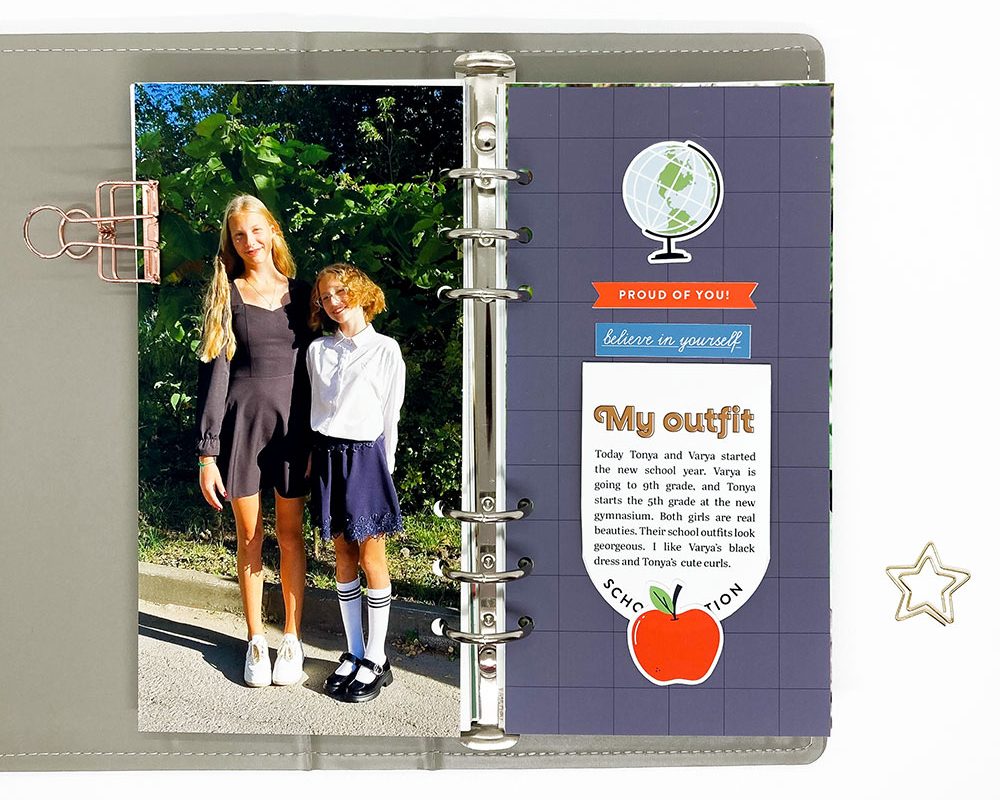
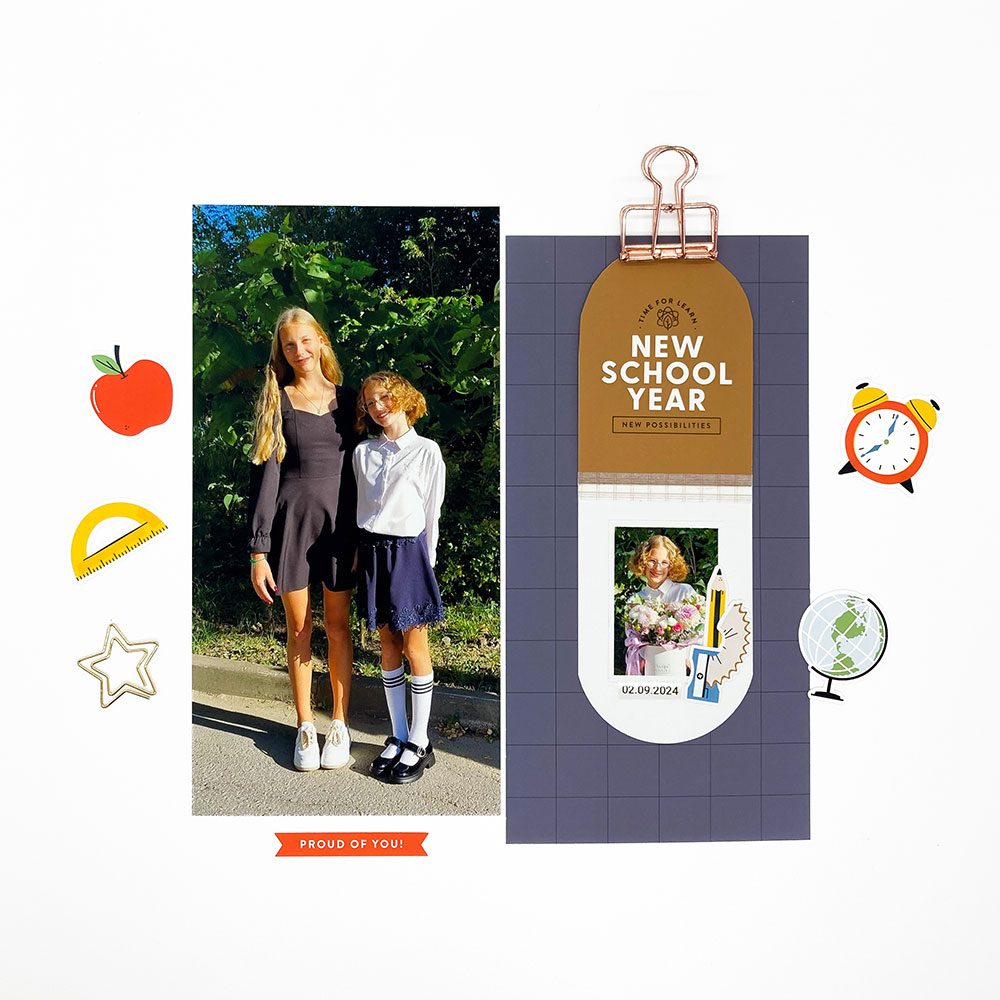
1. Full page photo.
I chose a photo of my nieces that was taken this year on the first day of school. Varya is in grade 9, and Tonya is in grade 5. We live far from each other, so I would like to add their photo to my traveler’s notebook. I started with photo editing – nothing special, just playing a little bit with brightness and contrast, giving more sharpness and checking it in CMYK color mode. Then I used my traveler’s notebook layout template to fix the photo size. In a view minutes the full page photo was actually ready.
2. Flip flap.
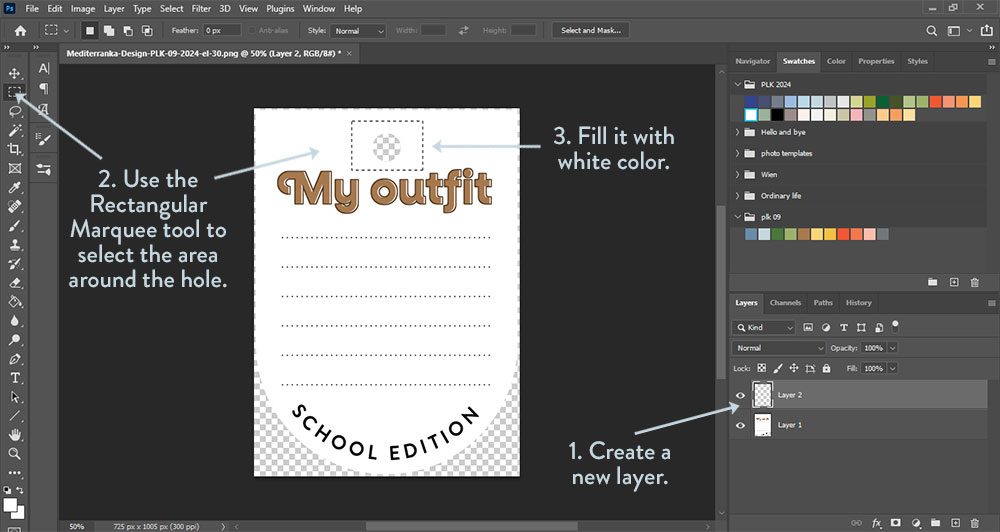
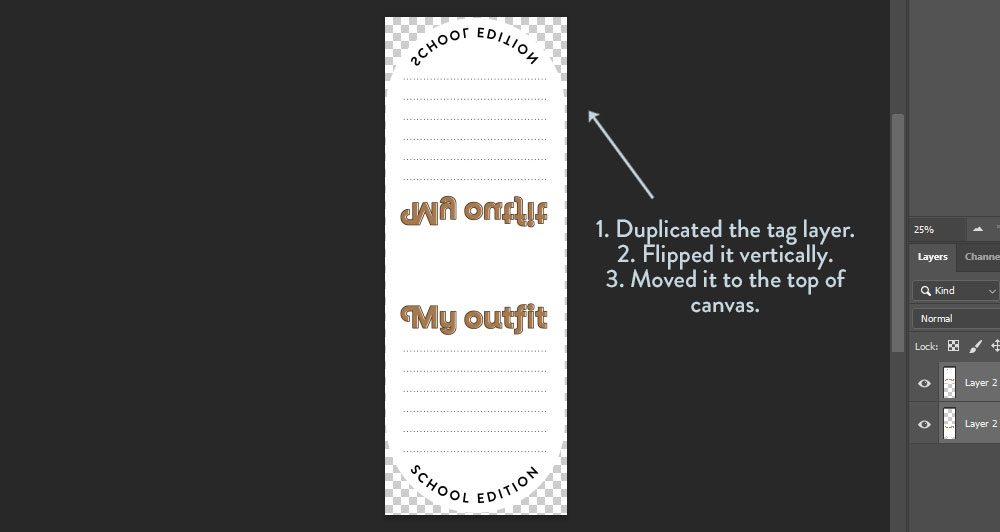
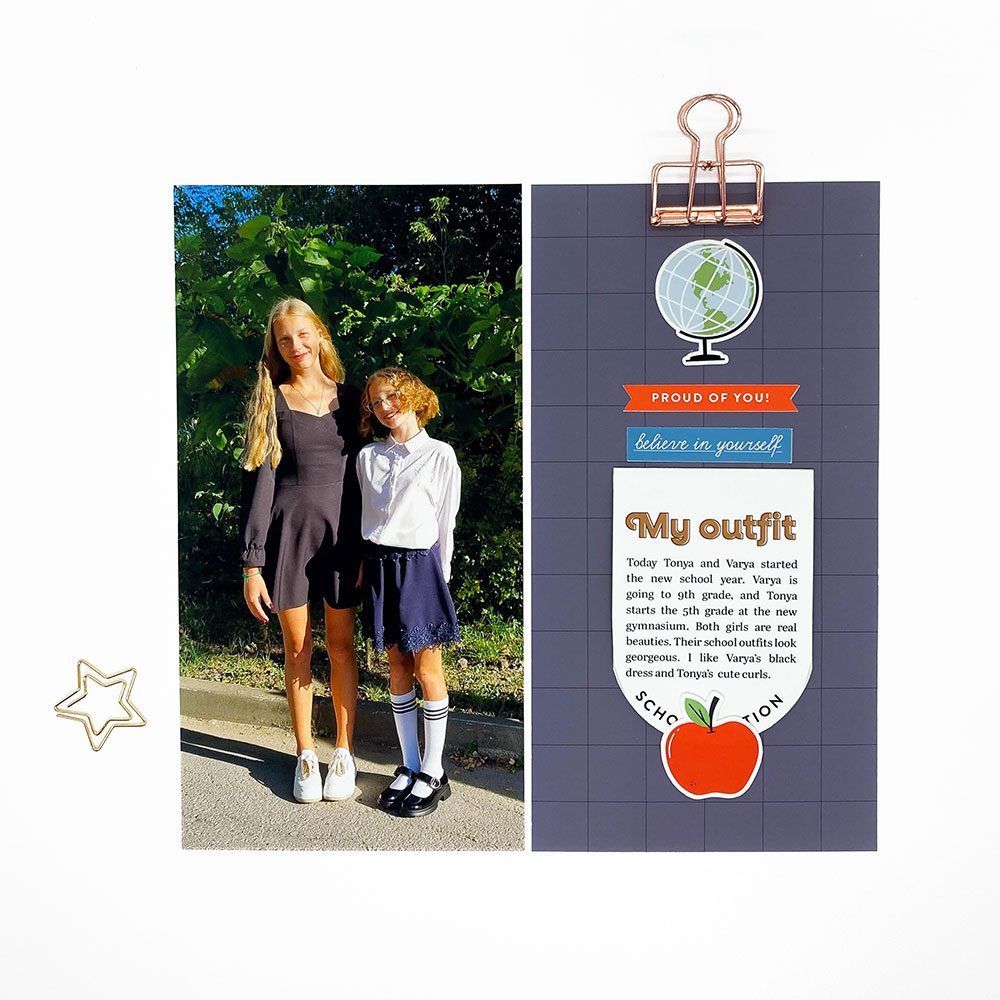
Now it's the time to create a flip flap. At first I opened the outfit tag from September 2024 Pocket life kit. I didn’t need the hole, so I just removed it. I created a new layer, used the Rectangular Marquee tool to select the area around the hole and fill it with white color.
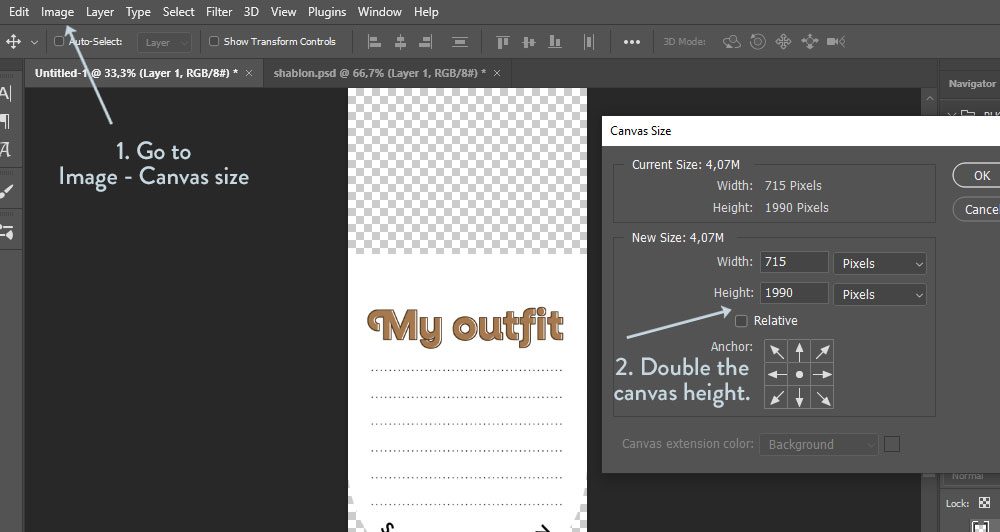
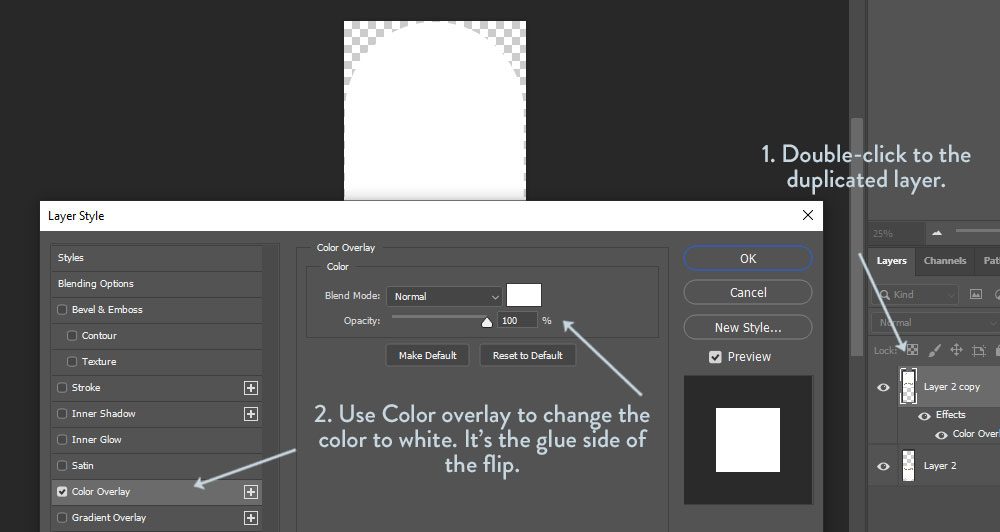
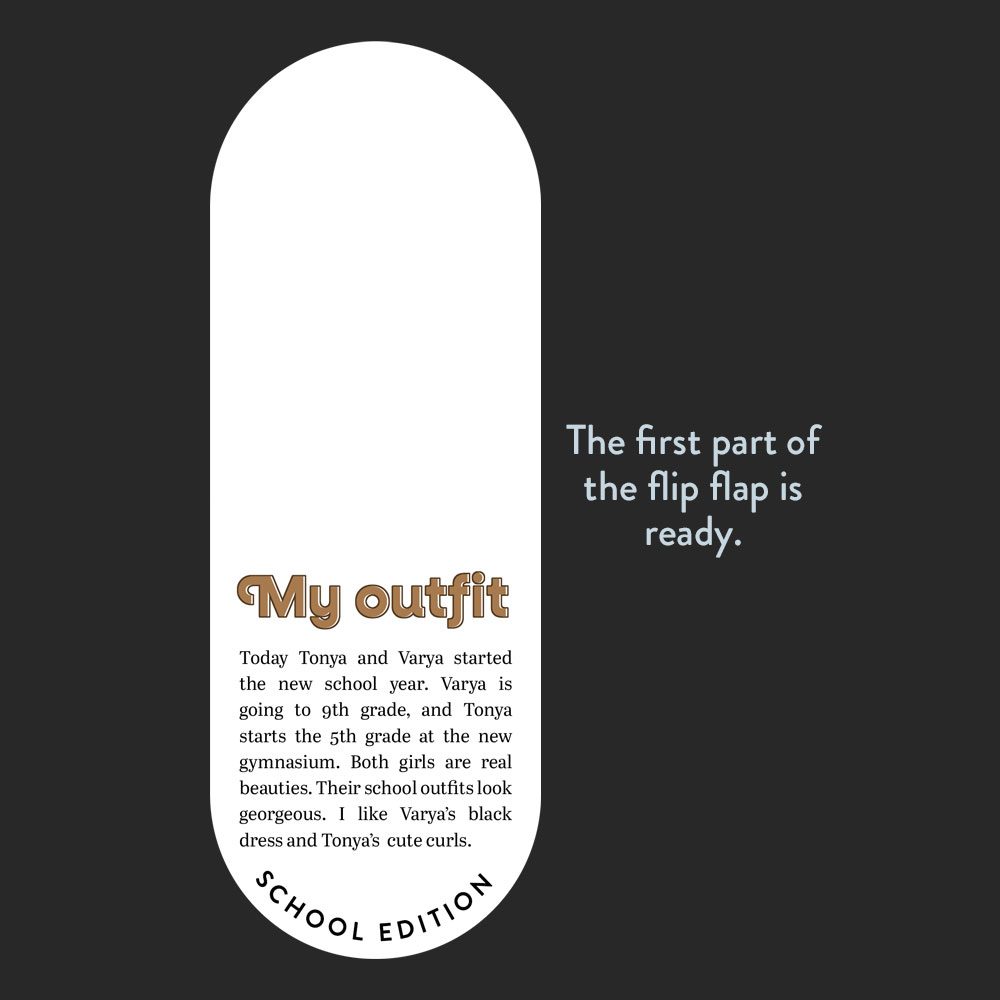
I doubled the canvas vertically, then duplicated the tag layer, flipped it vertically and moved it as shown in the screenshot. Both parts should fit snugly against each other along the future fold line. The part upstairs is the glue side of the flip, so I just change its color to white. Then I added the text to the front part of the flip, merged all the layers to create a single element and save it as .png

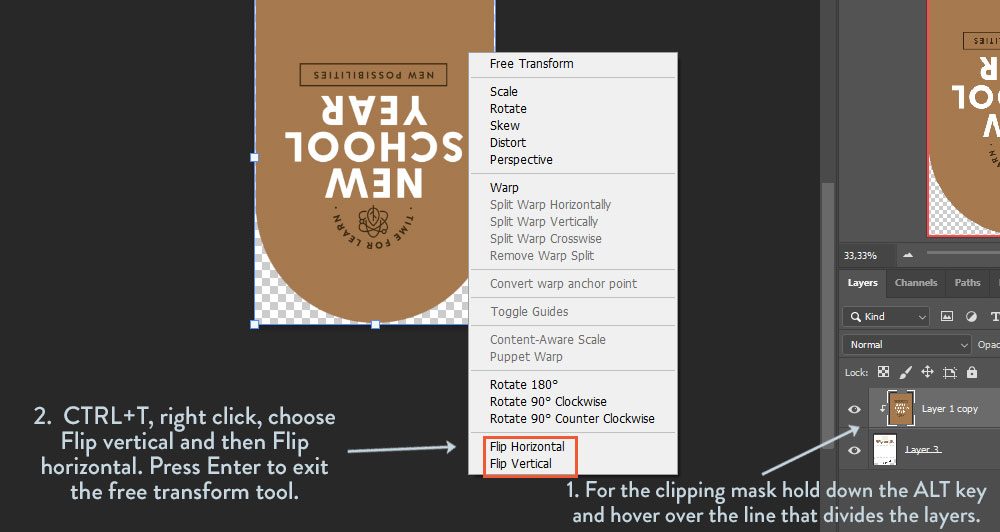
To decorate the back side of the flip tag I used the brown New school year card from September 2024 Pocket life kit. I opened the original outfit tag again and removed the hole as described above. Then I opened the brown card, copied it, put to the tag document and fixed the size of the card using clipping mask. I flipped the card vertical, centered it and saved as .png.
3. Getting all the parts together.
I also prepared Tonya’s portrait, which I want to hide using an interactive flip. This is a 4x5.5 cm photo with a white frame. After all parts of the flip tag were ready, I printed them, cut with my Silhouette cutting machine and put all the pieces together. I also used the plaid washitape to decorate the fold line.
I paired a full page photo with the dark grid pattern, then decorated the right page with the flip element and die-cuts stickers from September 2024 Pocket life kit. That’s all what I needed to finish this layout!
created with September 202 Pocket life kit
Olesya Rudenko Manaz
Hi there! I’m a graphic designer, scrapbooker and storyteller. I enjoy creating quality supplies to make scrapbooking and storytelling easy, fun and practical for you.

